 Home Improvement Ideas Introduction About Home Improvement If you are willing to renovate and upgrade your home but not have a good idea, then stop searching. We gave you a lot of information and stored data that enhance your knowledge and give you unique trims for Home Improvement. We give you some of the main postulates as well as problem fixes terms which give your home beauty and shine. Add Fresh Paint for Home Improvement It is a better way to use fresh paint at the beginning of the year for your home walls in both outsides and inside of your home as we can say that it is one of the easiest ways to improve our houses and apartments. Now there are two types of projects one is smaller, like a bedroom or drawing room, which you can paint out yourself. But if you want to have paint all around, ask for a painter to do this job of Home Improvement. Capitalize for the Home Device It is the very best idea to invest some of the money for smart home devices for outfitting your home apartment. This thing adds some of the new features to the home that one time spent but save your money all the time. Now this Home Improvement smart devices are the bulbs, thermostat, and some automated window shades. Cleaning of the Pantry for Home Improvement No doubt it is an excellent idea to clean out the pantry and kitchen drawer, which gives you rid of old spices. With the passage of time, it happens that your kitchen junked with the early receipt as well as dish rags irritated. Just cut them out and improve the kitchen as this is one of the home parts that makes it either shiny or dull. Establishment of Chimney for Home Improvement It is your first responsibility to ready out the chimney as it is part of Home Improvement for winter. This helps you in various aspects such as prevent from fire, carbon monoxide, and other poisoning. However, for making chimney, it is essential to hire someone very expert and experienced person. Cleaning of Windows for Home Improvement Just imagine you enter the home, and broken, stained windows attract you this thing makes a terrible impression. Although your whole house and things are right, the first impression is the last. So for cleaning the window, you first have to mix up some of the liquid dish soap and water in a large bucket. By use of sponge clean and drain out the windows corners as well as mirrors. Conclusion Home Improvement is not easy, but if you have significant skills and a stunning idea, you can handle it very quickly. Now, these are the fundamentals which mostly use for the improvement of homes.  Home Improvement Pergola
0 Comments
 Ceiling Fan Installation Instructions For Ceiling Fan Installation If you want the functional and additional style to your room then must install the ceiling fan. So if you are fully planning for the Ceiling Fan Installation then carry on this project. You can only adjust and install the ceiling if the outlet of the fan is already installed. Otherwise, there is another, step for installing the outlet by various methods. Anyhow this is not our topic today we discussing the Ceiling Fan Installation. This is a kind of project which you can do your own without any hesitation. Now it’s upon you either you can do it yourself or hire a professional one. Sometime rooms don’t get any box for fixing however for this you can also use an adjustable hanger bar. Turning Off all the Fuse In the ceiling box, you get a lot of wires from them either it connected with circuits or with other tools. Off the fuse again, check for the circuit by using a circuit breaker as well as a tester which informs you that all the wires are dead. Disconnect the Wire from Existing Box This is the second most important step in which you have to lose the cable clamp screw. For the working above of the panel remove the box if it is possible. The reason is that sometime it may happen sometimes the box above totally fixed up. Working for Install Adjustable Hanger Bar Most of the hanger bars installed by pushing them into the hole for the ceiling left with an old electrical box and operate it. After getting the complete hanger box into the hole rotate out it until its perpendicular joint out. When you expand out the bar automatically it moves further for attaching it and locking. When you take the hanger bar at that select sharp steel pins which you have to dig according to the holes? Assembling According to Fan Instruction No doubt ceiling fans are so heavy and need the support for fixing them. Indeed most of the models get away from the suspending box. But please do it carefully because if you haven’t any person then call for the helper to support out the fan. In more interesting things to note out that all the fans are not of the same type of wiring. Thus they are responsible and dependable on the speed control and wiring inside the room. Thus basic Ceiling Fan Installation is the same which we give these steps for the following. All the fans contain two kinds of wires white and red one is hot and the other is cold. All the game is of these two wires. Conclusion These are the steps that involve Ceiling Fan Installation, so if you are willing to install the fan please read this article. I hope you will get a lot of information from this blog.  Bedroom Ceiling Fan Installation  Knockdown Texture You are searching for the blog which gives you all the information about the Knockdown Texture and easy way to install it. We say to stop the search because this article gives you complete information about all aspects of this project. If you want to do it your own or hire someone, before doing anything first read out this. What is Knockdown Texture? Knockdown Texture mostly uses for the replacing of popcorn ceiling or finishing up the basement. If you want to complete or repair the old ceiling then again the Knockdown Texture is the only choice. There are various types and categories for making and building up the Knockdown Texture. Here we give you the best simple steps which you can follow by and make your Knockdown Texture. Besides this installation of Knockdown Texture first, we give you the list of material which we require for this job. Always remember these are compulsory tools that must be on the side of working.
Preparing Preparation is one of the most important as well as the fundamental step which you have done before starting any project. In this step, you have to move on all the furniture out of the room where you have to do this work. After getting this now covers the whole area with a large plastic paper. It is enough to cover the entire area and sheeting of walls. Mixing of Compound Need five-gallon measurable bucket which you can half full with drywall compound which you can attach with a paddle mixer. After attaching with a paddle mixer drill and add two more cups of water to that compound. When you place out the paddle mixer to the compound after it mixing it slowly you can make the drywall. If you don’t want to mix it your own then there is the bucket for mixing. Buy them they are available with the name of mud which is only for $10. Filling of Mixture This step is on almost the way of completion when the drywall product fully dry. At this stage, you have to fill your spray gun with a mixture which you have to set it to the orange-peel. Once to note out that when you go for the sprays first checked it? Scrapping This is the final step in which you can do yourself for Knockdown Texture projects to the scrape. In this step, you may need the knockdown knife. The knife must be smooth and textured peaks which create the random maze of design. Conclusion These are the four steps that give you complete guidelines about the Knockdown Texture and its placement. Now if you are willing to do then please proceed out all the steps one by one. 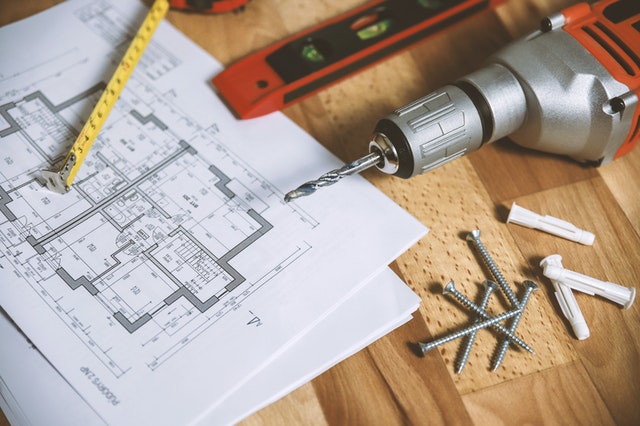 Knockdown Texture Projects  Popcorn Ceiling Removal Movies and popcorn go together but popcorn with ceiling has gone out of style from previous decades. Hence it was popular in the past due to easy installation and acoustic dampening qualities. This is why it is also called an acoustic ceiling, but is not popular anymore in modern design. This kind of ceiling makes the room appear dated and uninviting. There is good news for you, this kind of ceiling is also known as a textured ceiling. It is not easy to remove yourself but it can be done. Further Explanation The process of this project is straight forward to anyone which is usually tedious. The installation of this ceiling has been started since 1980. Unfortunately, these are the one small caveat because when it removes may be harboring asbestos. Caution Before Scrapping You can’t feel any stressed while Popcorn Ceiling Removal you can take its place easily. This ceiling looks very old and it is matched to the old fashion of 1990. Due to the textured compound and the paint used for the popcorn ceiling now, it is banned. This Popcorn Ceiling Removal as the asbestos is the natural mineral and the fibers used. For more information, we can say that this kind of ceiling directly affects your body. It only attacks the lungs and the liver of a human body. If an old man has lung problems and inhaling strong near this may cause death. This is all threat due to the compound of this ceiling. Due to this Popcorn Ceiling Removal is much important. Taking Out Sample of Asbestos Testing If the Popcorn Ceiling Removal contains any kind of asbestos, then it is only be completed by professional trained. Following is the method or steps which you can lead to Popcorn Ceiling Removal and gaining sample for asbestos testing.
There are a lot of tools, for scrapping out and removing out the ceiling removal. These are all steps that are less expensive and very easy to gain out.
This is the all kind of information which we give to you. After reading this article you can able to Popcorn Ceiling Removal. However, this article is also containing a list of tools that you can use out.  Popcorn Ceiling Removal Tools  How To Repair Drywall People give a lot of name for the drywall such as gypsum board, wallboard, gyp board plasterboard, etc. whatever people called to it still it needs repairing after passing of time because it is a modern type of building material which come into large panels. Normal drywall contains the panel of 4 x 8 which means 4 feet by 8 feet which contain the gypsum core.
If you see it closely it gives the shape like the sandwiched between the two heavy paper faces which are made up of recycled paper. This paper has two layers one is smooth and the other is Kraft paper which is held on the backing. Fundamental for Drywall Repairing One thing keeps in mind that Drywall Repairing based upon the fixes and construction of it in your home. In simple words I mean to say that either drywall adhesive by screws to fasten or use the ring shank. Most of the homeowners use the rings shanked methods which are acceptable and not create much problem or effort. Repairing of Drywall Popped Nails For preparing and repairing the popped drywall, we need again a delegate and special method. Hence we give you all the information based on popped nail proceeds as follows. Just take the point out and grab the information as much as you can. First of all, you have to fasten the ¼ inches thread drywall coarse while screwing above and below the popped nail. If it is difficult for you for screwing the drywall then use out the same ring-shank nails which cause the pop in the first place. You need two coats of premixed from them to use the first coat drywall joints compound and for the spackle. After the completion of the first coat, it’s time for the second coat of compound but first, you have to dry out the first coat. For this, you have to feather the edges which are almost 4 to 6 inches. This is step and the postulates which you may see for the repairing of drywall popped nails. Now the second term is the repairing of drywall which may have a dent in it. The dent in drywall is much easier than that of repairing the popped nail. Repairing of Dent in Drywall Use the taping blade knife as 4 to 6 inches blade fitted into it, no matter it is cheap disposal metal. In this repairing, you again use and apply the spackle drywall joint for the dented area, and after dried it use the sand.  Plumbing Handyman Services A Plumbers Handyman Services give you relief from the installation as well as repairing of pipes either they supply water or gas. Some of the pipes carry waste from your homes, apartments, and business offices to outside of the property. Such kinds of pipes need to be fixed or be repaired by a knowledgeable professional. If you want to install bathtubs, sinks, and toilets, then just call for the plumbing handyman services for this. They are well-skilled and able to fix any appliances related to the issue. Household Tasks For Plumbers Handyman Services The more experienced the plumber, the higher the rate, but most of these jobs can be done by a handyman that will charge less. Because the handyman with on the job experience can do just as well for most plumbing work which does not require a plumbing license. The following are the responsibilities and the tasks which Plumbers Handyman Services can accomplish.
As noted in the previous section, Plumbers Handyman Services earnings are based on just two things. One is the location of work and the other is the experience, however, they get a median salary which is higher than that of other trade workers. Category There are three main categories of salary for the plumber’s handyman services as follows and this is the statistics taken from the U.S. Bureau of Labor.
Almost all the plumber's are required to have trade school training as well as an apprenticeship. Hence for this training, he must have to pay to the institute, if you want to do work independently then you must have a license. Apprenticeship It is sponsored by the union or organization of employers and lasts from four to five years. The trade school requires 2000 hours in the classroom with training consisting of lectures and practicals. If you want to join this program, then you must be over 18 with a high school diploma before they will accept your application. Working Schedule of Plumbers Handyman Services Most plumbers are on call day and night which also includes evenings and weekends. Besides this, overtime is also common in this profession due to its high demand and emergency needs. These are serious considerations for someone contemplating this job. Handyman Tools |
AuthorThe author is a digital nomad currently based out of Saigon, Vietnam. ArchivesCategories |
 RSS Feed